Friday, December 26, 2014

Happy Holidays!!!

Hello everyone,

After a long time I am back to my blog, and to my surprise it is there waiting for me to be revived, lol.  I missed my blog and I don't know why I don't have the tendency to post regularly. I am trying and trying but there is always something else in the way. My blog is at the end of my list of priorities. I won't make false promises but I am changing my priorities and I know if I want to keep the audience coming I need to post regularly. I apologize for that and I will try to make it different.

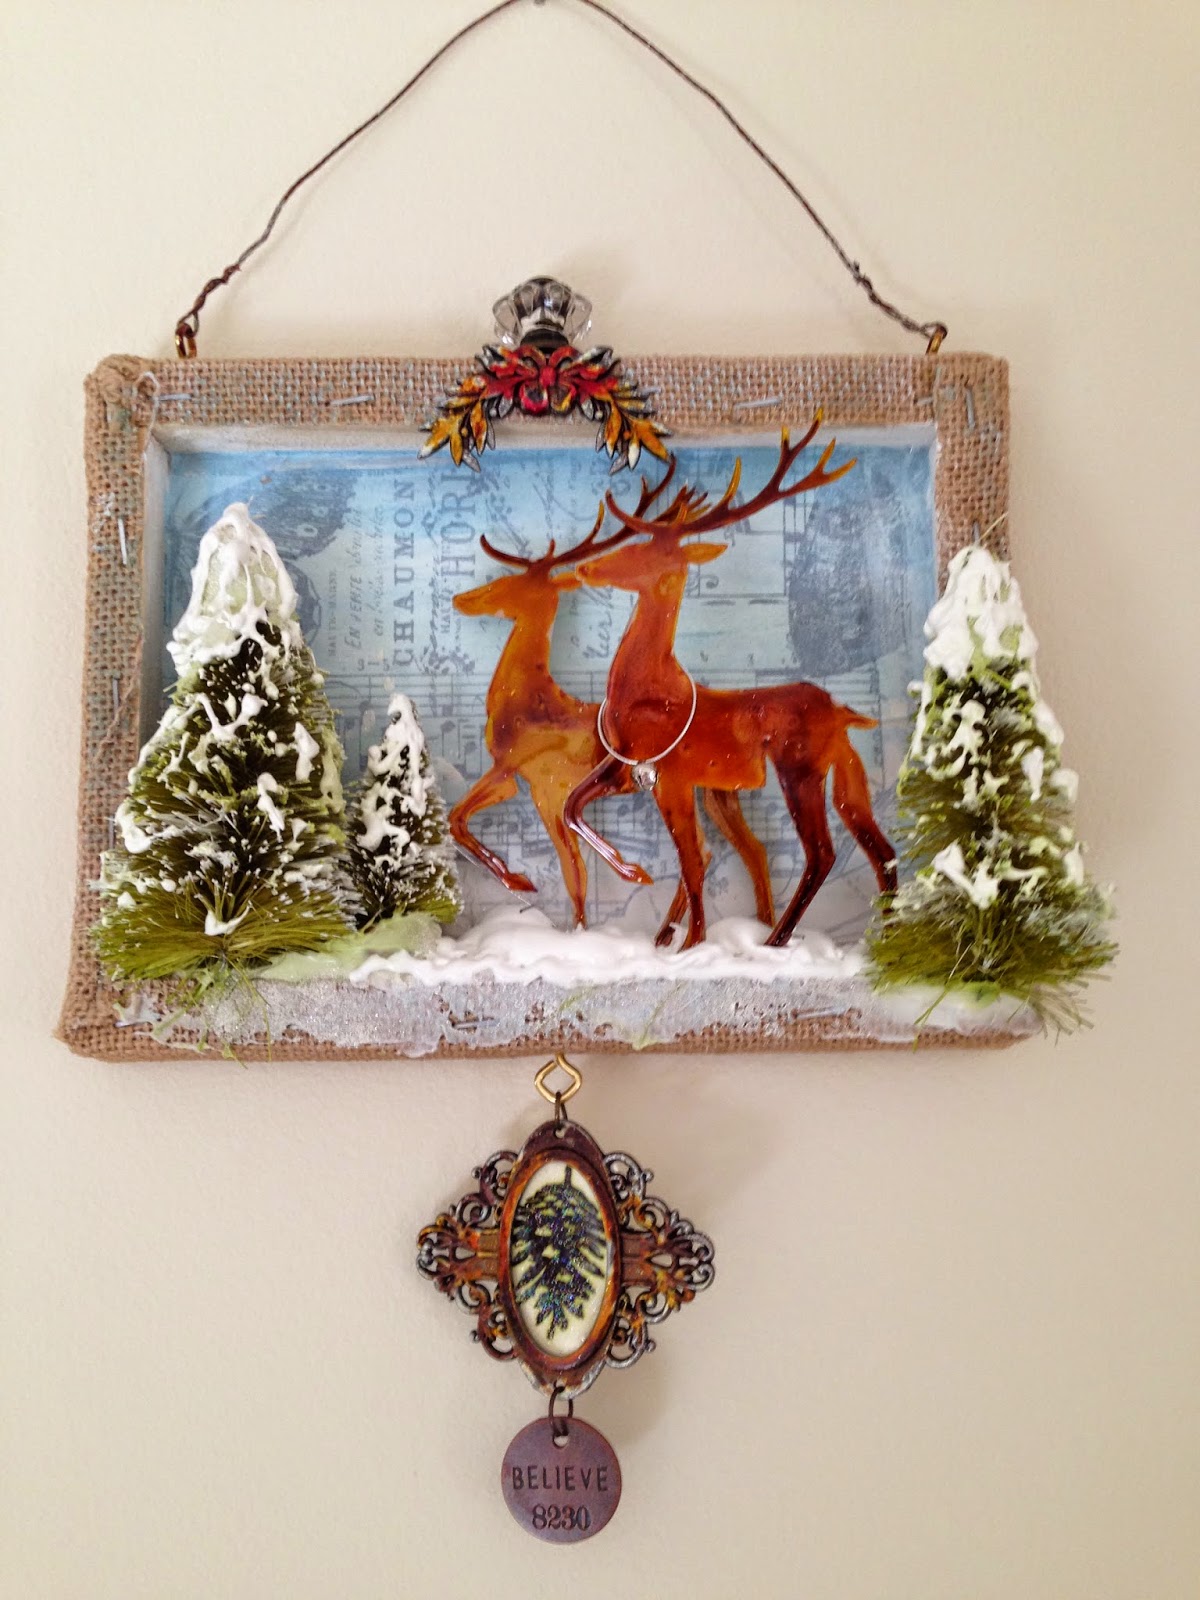
I got inspired by Ann-Karin's post on Tim Holtz's blog to create these two shadow boxes. I loved it since the first time it was posted on his blog and here is my version that I wanted to share with all of you. I followed step by step the tutorial posted on Tim's blog, adding my twist to make it different but using basically the same supplies.


Besides those two shadow boxes I was inspired to come up with this BE YOURSELF canvas. 


Hope you like them and get inspired to create something for this holiday season also.

Best wishes to all of you!


Friday, June 15, 2012

Our Creative Corner: Your Favorite Tim Holtz Technique

Hi everyone! Hope everyone is enjoying the summer. Here in Miami it is pretty hot, but with stormy weather ahead, it looks like the temperature is going to drop a little bit.

It's been a while since the last time I participated in Our Creative Corner Challenge. This week the challenge is about our favorite Tim Holtz technique. It is a tough decision because I like them all, but to narrow down my selection I have to say that after participating in Creative Chemistry class I love the Custom Stamp Pad Technique. I think that it is so creative and at the same time original. I fell in love with this technique!

For this technique you are going to need Cut-N-Dry stamp pad felt, any stamp (I used the butterfly stamp) but preferably not a solid one, distress reinkers in different colors, archival permanent black ink and white or vanilla cardstock.

First, stamp the image on the Cut-N-Dry stamp pad felt on the fabric side with archival permanent black ink. Then with the reinkers in different colors fill in the image. That is going to work like your ink pad. Wet your stamp on your ink pad and stamp on a cardstock, and your image will be with multiple colors, as many as you put on your ink pad. This is a fun and innovative technique. Hope you like it!

Thanks for stopping by! Have a wonderful weekend!


Friday, May 18, 2012

Card Patterns #165 and Embellish Magazine Challenge

Another card for two challenges. This time I combined the sketch of the Card Patterns Challenge and the colors of the  Bicycle Color Trends Challenge. Each time I use a Magnolia image for my cards or any other image to color it in I feel like it made my day, lol. It is like a bow on the present, because when I give color to an image or I grab a brush to do watercolor or any other painting on a card, it is like the cherry on top. It is like I carry my energy through that brush (or colored pencil or whatever I'm using) and I feel happy.

Hope you like my creation today! Thanks for stopping by! Have a wonderful day full of inspiration!

Lili


colourQ #137 and Sweet Sunday Sketch #158

It's been a while since I posted a card. I've been pretty busy with my other blog. I updated it and it takes a lot of time to do it. I have to thank my daughter, Carla, who is next to me all the time helping me not only with the blog but also with everything that has to do with technology. Sorry I am not a flash with that. I am learning but I am a slow turtle, lol, but eventually I'll get there.

Besides that, there are some changes, too. They have been posted in my other blog and it is related to the new project I created with my friends, Martha Lucia, Geraldine and Teresa, and it is called "Projects in Spanish" which of course is completely in Spanish. There you are going to find tutorials for sale in inches and centimeters, and full of photos. If you are interested, visit www.proyectosenespanol.com. or go to www.anartistica.blogspot.com to subscribe for only $24.95.

The card I created today is for the colourQ and Sweet Sunday Sketch challenge. As you know how much I love to color in Magnolia images, I decided to color one of those images for these two challenges.

Thanks for stopping by! Have a wonderful day!


Friday, April 20, 2012

Our Creative Corner and Retrosketches #7

I combined the Our Creative Corner challenge: "Our Boys and Their Toys" with the sketch from Retrosketches #7. The theme for Our Creative Corner challenge is to show the hobby or interest of a man in our life – husband, father, son, brother or another male member of your family. In my case, soccer is the family sport. There is always room for a soccer ball and wherever my boys are, they have fun playing with it. For the Retrosketches challenge, we have to follow the sketch. Hope you like my creation! Have a wonderful weekend!

Thanks for stopping by!
Lili


Sunday, April 15, 2012

TOMIC #45- Criss Cross Card & Color Throwdown #187

For this week's TOMIC #45, we have to create a Criss Cross Card and to use a stamp from one of the Magnolia's last collection "Princes & Princesses", or if you don't have any from that collection you can use any stamp related to princes and princesses. DT Silvie graciously created a tutorial on how to create a Criss Cross Card, which makes it easier to create the card. I combined this challenge with the Color Throwdown challenge in which the color combo is Certainly Celery, Chocolate Chip, So Saffron and Lavender Lace. Hope you like it! Enjoy!

Thanks for stopping by!
Lili


Freshly Made Sketches #30

This is one of the mini Magnolias that I got lately and I decided to create a card with her for Freshly Made Sketches #30. It is a little bit harder to color it in with Copics but, anyway, it is so much fun to see how she takes life in front of you. I hope you like my creation! Enjoy! Have a great day!

Thanks for stopping by!
Lili